Fine-Tuning Gemma 2-9B on GKE using Metaflow and Argo Workflows

This tutorial will provide instructions on how to deploy and use the Metaflow framework on GKE (Google Kubernetes Engine) and operate AI/ML workloads using Argo-Workflows. The tutorial is designed for ML Platform engineers who plan to use Metaflow for ML workloads on top of GKE by offloading resource-intensive tasks to a managed cluster.
Overview
- Provision GKE cluster and install Argo Workflows using Terraform.
- Deploy and configure Metaflow’s Metadata Service.
- Set up Metaflow to work with Argo Workflows.
- Build a fine-tuning image with Cloud Build.
- Fine-tune the model using Metaflow and Argo Workflow and GKE.
- Deploy the fine-tuned model on GKE for inference.
Before you begin
-
Ensure you have a gcp project with billing enabled and enabled the GKE API.
-
Ensure you have the following tools installed on your workstation
If you previously installed the gcloud CLI, get the latest version by running:
gcloud components update
Ensure that you are signed in using the gcloud CLI tool. Run the following command:
gcloud auth application-default login
Infrastructure Setup
Clone the repository
Clone the repository with our guides and cd to the llamaindex/rag directory by running these commands:
git clone https://github.com/ai-on-gke/tutorials-and-examples.git
cd tutorials-and-examples/mlflow/finetune-gemma
Filesystem structure
finetune_inside_metaflow/- folder with Metaflow Flow for fine-tuning the Gemma-2 model.serve_model/- a simple deployment manifest for serving the fine-tuned model within the same GKE cluster.metaflow/manifests/- folder with Kubernetes manifests. These files are templates that require additional processing by the terraform to specify additional values that are not known from the start.terraform/- folder with terraform config that executes automated provisioning of required infrastructure resources.
Create cluster and other resources
In this section we will use Terraform to automate the creation of infrastructure resources. For more details how it is done please refer to the terraform config in the terraform/ folder.
By default, the configuration provisions an Autopilot GKE cluster, but it can be changed to standard by setting autopilot_cluster = false.
It creates:
- Cluster IAM Service Account – manages permissions for the GKE cluster.
- Metaflow Metadata Service IAM Service Account – grants Kubernetes permissions for Metaflow’s metadata service using Workload Identity Federation
- Argo Workflows IAM Service Account – grants Kubernetes permissions for Argo Workflows using Workload Identity Federation
- CloudSQL instance for Metaflow metadata database
- GCS bucket for Metaflow’s artifact storage
- Artifact registry – stores container images for the fine-tuning process.
-
Go the the terraform directory:
cd terraform -
Specify the following values inside the
default_env.tfvarsfile (or make a separate copy):<PROJECT_ID>– replace with your project id (you can find it in the project settings).
Other values can be changed, if needed, but can be left with default values.
-
(Optional) For better state management and collaboration, you can configure Terraform to store its state in a GCS bucket instead of keeping it locally. Create a bucket manually and then uncomment the content of the file
terraform/backend.tfand specify your bucket:terraform { backend "gcs" { bucket = "<bucket_name>" prefix = "terraform/state/metaflow" } } -
Init terraform modules:
terraform init -
Optionally run the
plancommand to view an execution plan:terraform plan -var-file=default_env.tfvars -
Execute the plan:
terraform apply -var-file=default_env.tfvarsAnd you should see your resources created:
Apply complete! Resources: 106 added, 0 changed, 0 destroyed. Outputs: argo_workflows_k8s_sa_name = "metaflow-tutorial-argo-sa" cloudsql_instance_name = "metaflow-tutorial-tf" gke_cluster_location = "us-central1" gke_cluster_name = "metaflow-tutorial-tf" metaflow_datastore_bucket_name = "metaflow-tutorial-tf" metaflow_k8s_namespace = "default" metaflow_k8s_sa_name = "metaflow-tutorial-sa" project_id = "akvelon-gke-aieco" -
Configure your kubectl context:
gcloud container clusters get-credentials $(terraform output -raw gke_cluster_name) --region $(terraform output -raw gke_cluster_location) --project $(terraform output -raw project_id)
Metaflow Configuration
Deploy Metadata Service
This tutorial includes two Kubernetes manifests for Metaflow Metadata service:
- Metadata-service - Keeps track of metadata.
- UI-service - Provides a backend instance that powers a web interface for monitoring active flows.
The manifests are generated from templates in the metaflow/manifests/ directory and put in the gen directory.
-
Apply metadata service manifest:
kubectl apply -f ../gen/metaflow-metadata.yaml -
Wait for deployment is completed:
kubectl rollout status deployment/metaflow-metadata -
Apply UI service manifest:
kubectl apply -f ../gen/metaflow-ui.yaml -
Wait for deployment is completed:
kubectl rollout status deployment/metaflow-ui -
Open new terminal and forward the metadata service port. Keep this terminal running to ensure connection to a remote metadata service:
kubectl port-forward svc/metaflow-metadata-svc 8080:8080 -
Open new terminal and forward port for UI. Keep this terminal running to ensure connection to a Metaflow UI service:
kubectl port-forward svc/metaflow-ui-svc 8083:8083 -
Open http://localhost:8083/. Now all new submitted Metaflow runs will be shown here.
Install and configure Metaflow client library
-
Create a Python virtual environment, activate it and install Metaflow and other requirements.
python3 -m venv ../venv . ../venv/bin/activate python3 -m pip install metaflow google-cloud-storage google-auth kubernetes==31.0.0 -
Create metaflow’s config folder, if not present:
mkdir -p ~/.metaflowconfig -
Create Metaflow config. Some of the missing values we get from the terraform output.
cat <<EOF > ~/.metaflowconfig/config.json
{
"METAFLOW_DEFAULT_METADATA": "service",
"METAFLOW_SERVICE_URL": "http://localhost:8080",
"METAFLOW_SERVICE_INTERNAL_URL": "http://metaflow-metadata-svc.default:8080/",
"METAFLOW_DEFAULT_DATASTORE": "gs",
"METAFLOW_DATASTORE_SYSROOT_GS": "gs://$(terraform output -raw metaflow_datastore_bucket_name)",
"METAFLOW_KUBERNETES_NAMESPACE": "argo",
"METAFLOW_KUBERNETES_SERVICE_ACCOUNT": "$(terraform output -raw argo_workflows_k8s_sa_name)",
"METAFLOW_KUBERNETES_DISK": 2048
}
EOF
More on Metaflow configuration values:
Name Description METAFLOW_DEFAULT_METADATA With the serviceoption, it communicates with the metadata service that has been deployed.METAFLOW_SERVICE_URL URL for your Metaflow CLI to communicate with the metadata backend. METAFLOW_SERVICE_INTERNAL_URL Internal URL for the same metadata backend. METAFLOW_DEFAULT_DATASTORE Specifies the type of storage where metaflow will store artifacts of its runs. In our case it is a GCS bucket. METAFLOW_DATASTORE_SYSROOT_GS GCS bucket name to store artifacts produced by metaflow runs. METAFLOW_KUBERNETES_NAMESPACE Namespace in the cluster for metaflow runs. In our case it is argoMETAFLOW_KUBERNETES_SERVICE_ACCOUNT Service account which is assigned to pods with Metaflow runs. METAFLOW_KUBERNETES_DISK Sets disk size for a container for metaflow run. The default value of this option is too big for Autopilot GKE cluster, so we decrease it to 2048
Gemma 2 Model Fine-tuning and Serving
Build the Gemma 2 fine-tuning container image
The model fine-tuning process requires a dedicated environment, which we will encapsulate in a container image. The Dockerfile can be found in finetune_inside_metaflow/image/Dockerfile.
-
Build the image using Cloud Build and push it to the newly created repository. That may take some time:
gcloud builds submit ../finetune_inside_metaflow/image --config=../cloudbuild.yaml
More details can be found in the cloudbuild.yaml file.
Fine-tune the Gemma 2 model
-
Specify your HuggingFace token. It will be used to access model that we want to finetune:
export HF_TOKEN="<your_token>" -
Specify your HuggingFase user
export HF_USERNAME="<your_username>" -
Create secret with your token to HuggingFace:
kubectl -n argo create secret generic hf-token --from-literal=HF_TOKEN=${HF_TOKEN} -
Create a persistent volume claim for the transformers library cache because the cache can grow more than 10GB and GKE’s ephemeral storage can provide only up to 10GB on Autopilot mode:
kubectl apply -f ../metaflow/manifests/cache-pvc.yaml -
Create argo-workflows template from the metaflow fine-tuning script:
python3 ../finetune_inside_metaflow/finetune_gemma.py argo-workflows createHere is the overfiew of the FinetuneFlow class:
class FinetuneFlow(FlowSpec): # specify environment variables required by the finetune process @environment(vars={ # model to finetune "MODEL_NAME": "google/gemma-2-9b", "LORA_R": "8", "LORA_ALPHA": "16", "TRAIN_BATCH_SIZE": "1", "EVAL_BATCH_SIZE": "2", "GRADIENT_ACCUMULATION_STEPS": "2", "DATASET_LIMIT": "1000", "MAX_SEQ_LENGTH": "512", "LOGGING_STEPS": "5", "HF_HUB_CACHE": "/tmp/hf-cache", }) # specify kubernetes-specific options @kubernetes( image=constants.FINETUNE_IMAGE_NAME, image_pull_policy="Always", cpu=2, memory=4096, # secret to huggingfase that has to be added as a Kubernetes secret secrets=["hf-token"], # specify required GPU settings gpu=2, node_selector={"cloud.google.com/gke-accelerator": "nvidia-l4"}, persistent_volume_claims={ "hf-cache-pvc": "/tmp/hf-cache", }, ) @retry @step def start(self): print("Start Fine-tuning") import finetune finetune.finetune_and_upload_to_hf( new_model="finetunned-gemma2-9b" ) self.next(self.end) @step def end(self): print("FinetuneFlow is finished.") -
Open new terminal and forward port for argo-workflows server. Keep this terminal running to ensure uninterrupted access to the argo-workflows UI.
kubectl -n argo port-forward svc/argo-server 2746:2746 -
Open argo-workflows UI at https://localhost:2746 and go to the workflow templates section. There must be a template that you have created earlier.
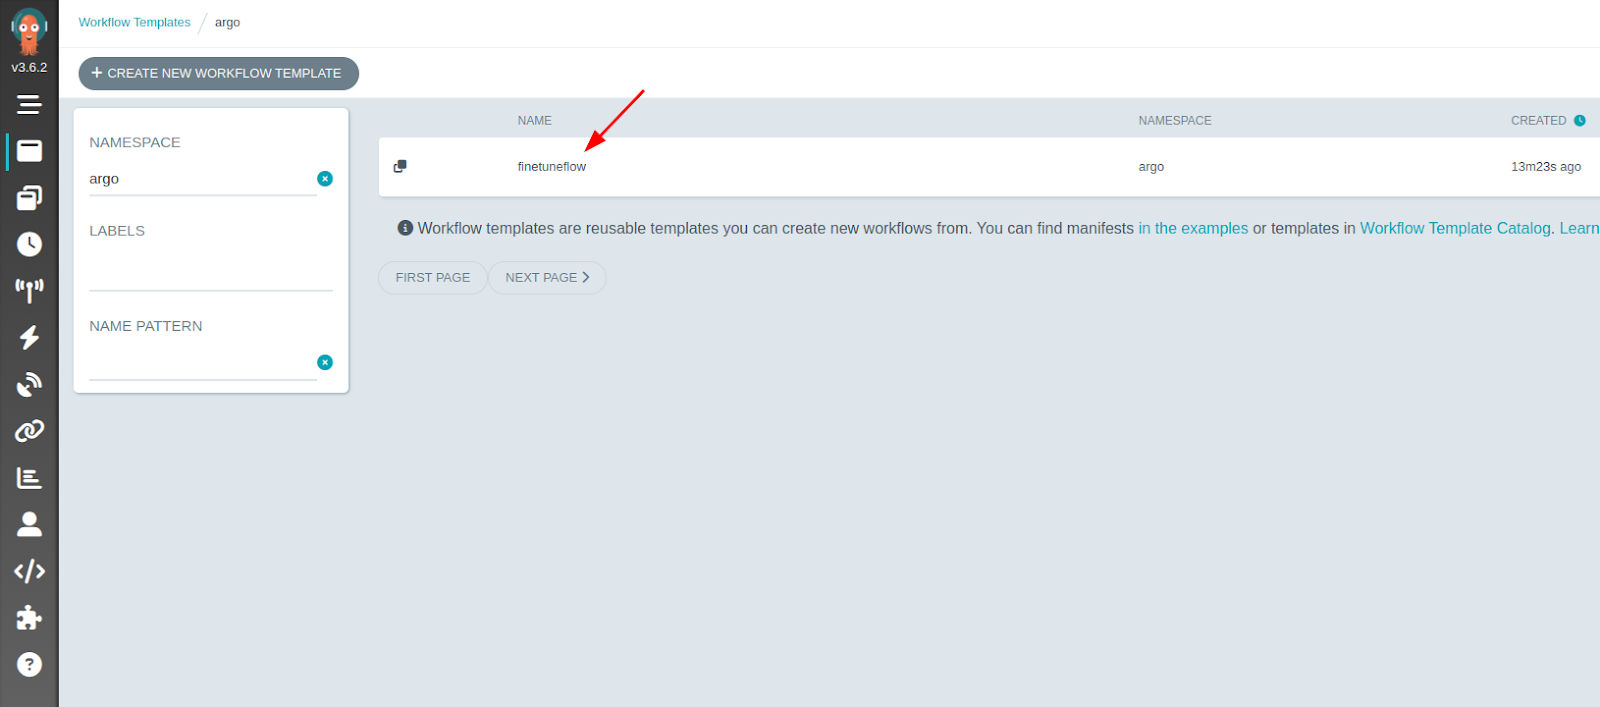
-
Select this template and click submit to start the workflow:
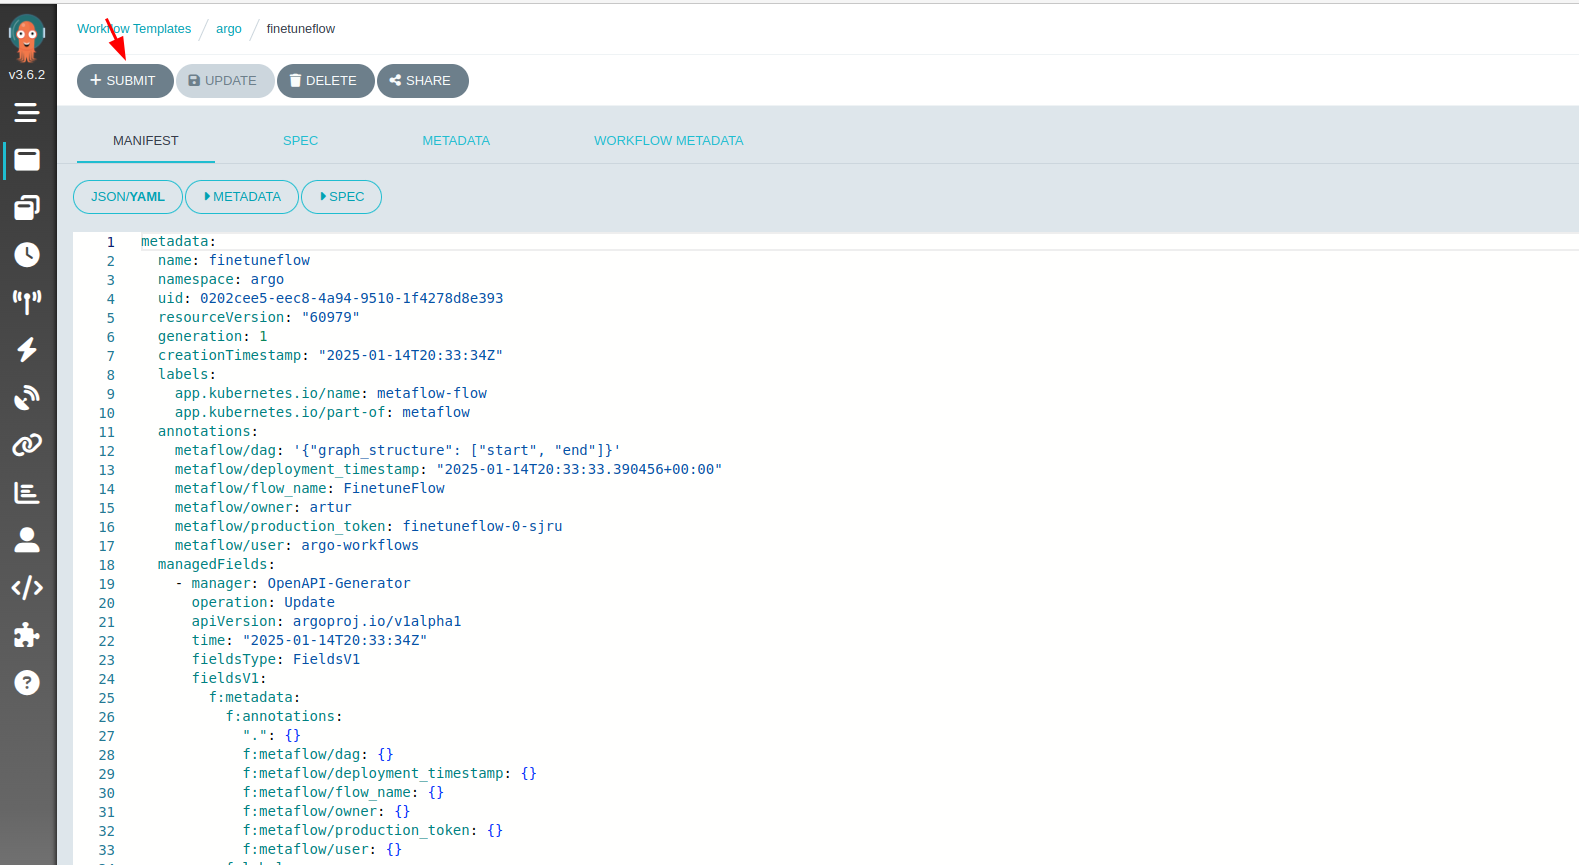
Wait until the fine-tuning process is completed and a new model is uploaded to the HuggingFace. It should take around 30 minutes to complete.
Note: There may be temporary warnings about insufficient cluster resources, but they should be eventually resolved in a few minutes.
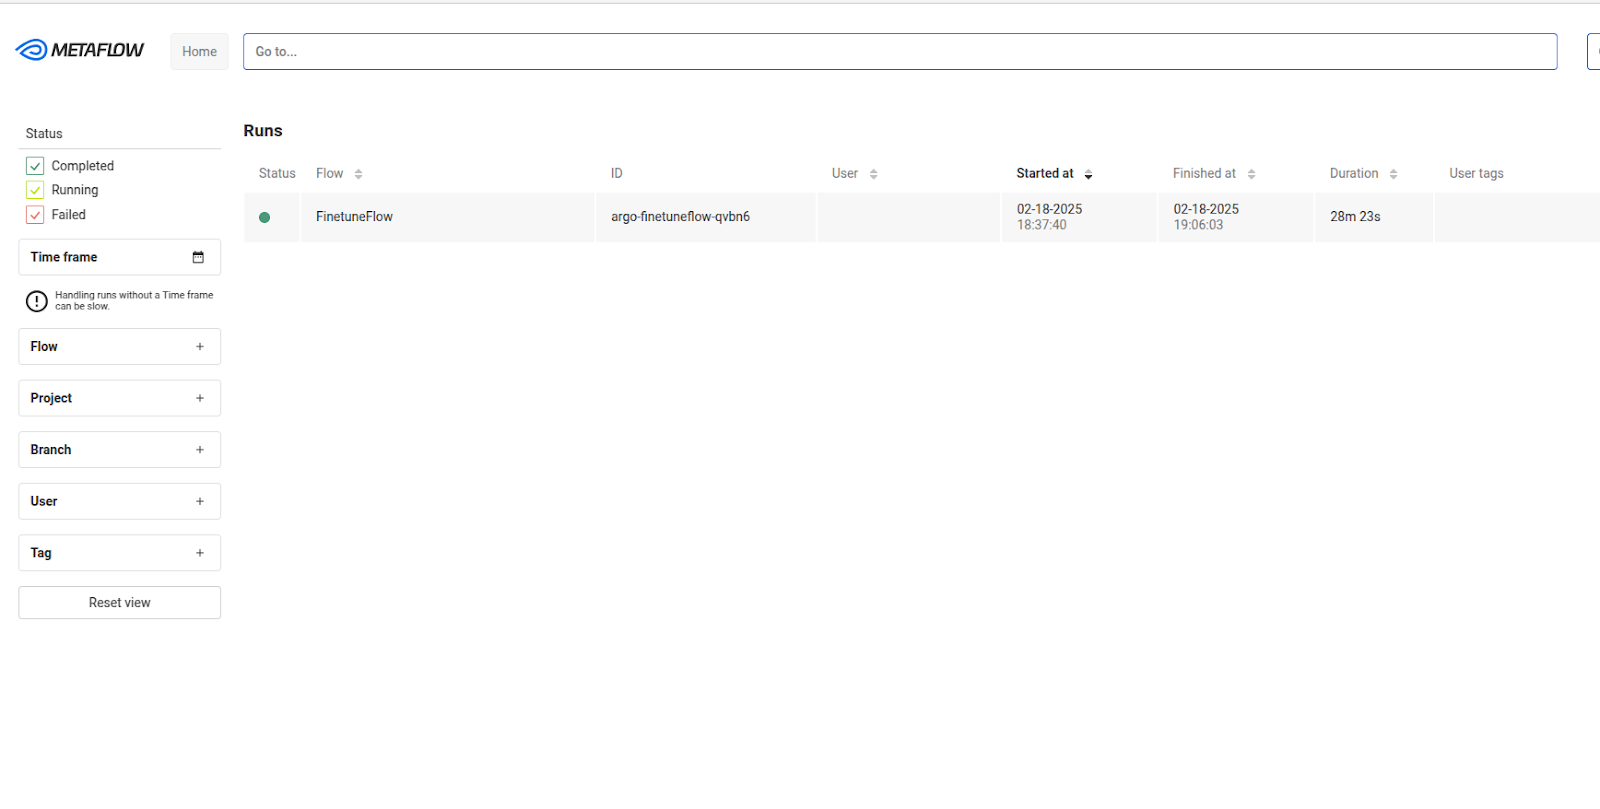
You can open the Metaflow UI at http://localhost:8083/ to monitor the execution details of your Metaflow flows.
Note: this UI does not display the model upload status to HuggingFace
-
Go to your Hugging Face profile to verify that the fine-tuned model has been uploaded:
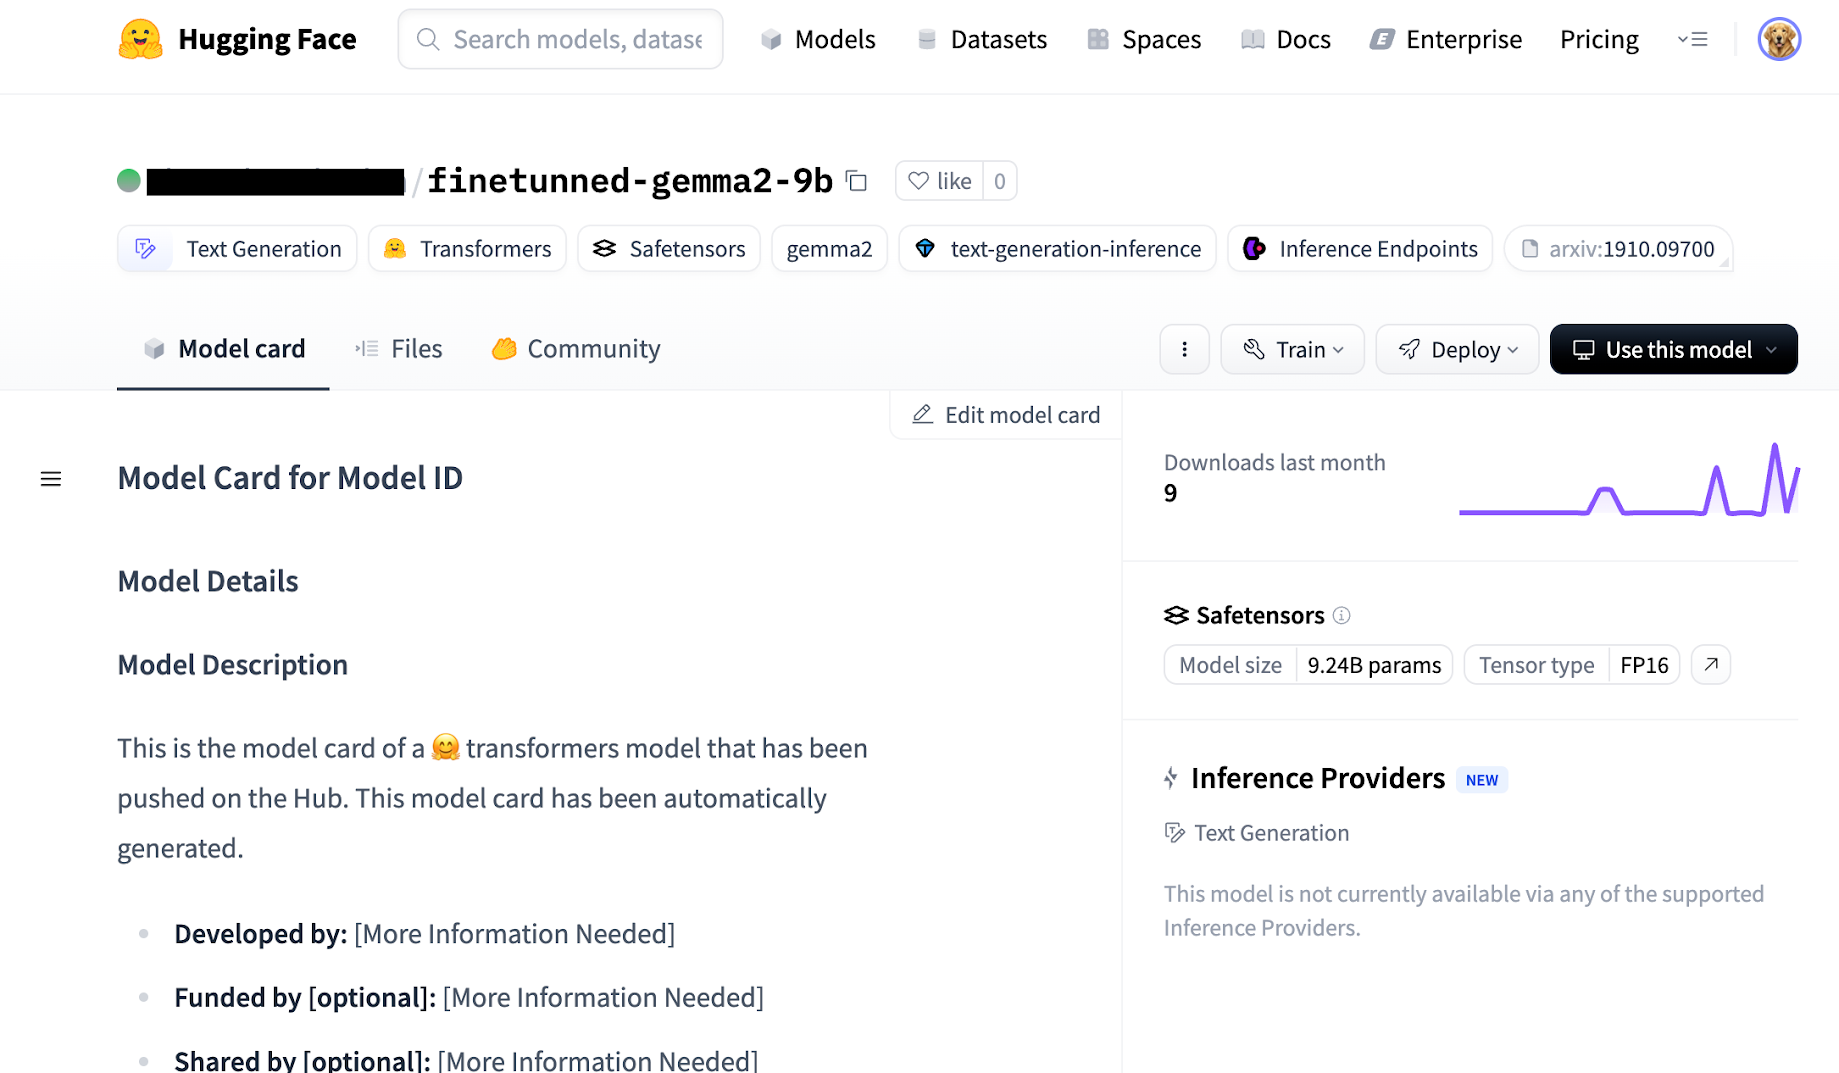
Serve the Fine-Tuned Gemma 2 Model on GKE
-
Replace the placeholder for your HuggingFace handle and run this command.
kubectl create configmap vllm-config --from-literal=model_id="${HF_USERNAME}/finetunned-gemma2-9b" -
Create secret with your token to HuggingFace:
kubectl create secret generic hf-token --from-literal=HF_TOKEN=${HF_TOKEN} -
Deploy the resulting model to GKE. This will deploy the inference server and it will serve a previously finetuned model. The deployment
serve_model/vllm_deplyment.yamlis based on this instructionkubectl apply -f ../serve_model/vllm_deplyment.yaml -
Wait for deployment is completed. It may take some time:
kubectl rollout status deployment/vllm-gemma-deployment -
Wait until the model is pulled and initialized. Open pod’s container log watch:
kubectl logs -l app=gemma-server -fWhen everything is initialized, the end of the logs output should be:
INFO:     Started server process [1]
INFO:     Waiting for application startup.
INFO:     Application startup complete.
INFO:     Uvicorn running on http://0.0.0.0:8000
Press
Ctrl+Cto quit the log watch. -
Open another terminal and forward port for of the inference server:
kubectl port-forward svc/llm-service 8000:8000 -
Interact with the model
USER_PROMPT="Question: What is the total number of attendees with age over 30 at kubecon \\\"EU\\\"? Context: CREATE TABLE attendees (name VARCHAR, age INTEGER, kubecon VARCHAR)\nAnswer:"

curl -X POST http://localhost:8000/generate \
  -H "Content-Type: application/json" \
  -d @- <<EOF
{
    "prompt": "${USER_PROMPT}",
    "temperature": 0.90,
    "top_p": 1.0,
    "max_tokens": 32
}
EOF
The output should look like this:
{"predictions":["Prompt:\nQuestion: What is the total number of attendees with age over 30 at kubecon \"EU\"? Context: CREATE TABLE attendees (name VARCHAR, age INTEGER, kubecon VARCHAR)\nAnswer:\nOutput:\n SELECT COUNT(name) FROM attendees WHERE age > 30 AND kubecon = \"EU\"\nContext: CREATE TABLE attendees (name VARCHAR, age INTEGER"]}
Cleanup
-
Destroy the provisioned infrastructure.
cd terraform
terraform destroy -var-file=default_env.tfvars
Troubleshooting
- In case of usage of this guide by multiple people at the same time, consider renaming resource names in the
default_env.tfvarsto avoid name collisions. - Some operations over the autopilot cluster can hang and complete once the initial scale-up event has finished.
- Sometimes access to the network through
kubectl port-forwardstops working and restarting the command can solve the problem.
Feedback
Was this page helpful?
Thank you for your feedback.
Thank you for your feedback.