Building a Multi-Agent Code Development Flow with Flowise on GKE

This tutorial will provide instructions on how to deploy and use Flowise on GKE (Google Kubernetes Engine) to build and operate AI applications using a low-code/no-code approach.
Overview
This tutorial is designed for developers and platform engineers interested in leveraging Flowise on GKE for building customized LLM flows and AI agents, offloading resource-intensive tasks to a managed cluster. Managed clusters automatically handle the complex infrastructure requirements of AI applications like scaling GPU nodes for model inference, managing variable workloads, allowing developers to focus on building AI solutions rather than managing servers. Flowise is a low-code/no-code platform that enables developers to build and deploy AI applications and multi-agent systems through a visual drag-and-drop interface without extensive programming. As an example for this tutorial, we will create a multi-agent application that acts as a software development team with a software developer and a code reviewer which are coordinated by a supervisor. The example demonstrates Flowise’s core multi-agent coordination capabilities. This showcases how AI agents can collaborate on complex tasks—with a supervisor orchestrating between a code writer and reviewer. For more info, you may want to read the docs.
What will you learn
- Provision required infrastructure automatically (using Terraform). The GKE Autopilot cluster is used by default.
- Install Flowise on the GKE cluster.
- Configure Flowise to build and manage LLM flows.
- Build a sample AI application (e.g., a chatbot or agent) using Flowise components.
- Serve the resulting AI application from the GKE cluster.
Filesystem structure
├── agentflow.json  # Example Flowise agentflow.
├── terraform/      # Terraform config that creates required infrastructure.
├───── cloudsql.tf
├───── default_env.tfvars
├───── main.tf
├───── network.tf
├───── outputs.tf
├───── variables.tf
├───── bucket.tf
└───── workload_identity.tf
Before you begin
- Ensure you have a GCP project with billing enabled and enable the GKE API.
- Ensure you have the following tools installed on your workstation
If you previously installed the gcloud CLI, get the latest version by running:
gcloud components update
Ensure that you are signed in using the gcloud CLI tool. Run the following command:
gcloud auth application-default login
Infrastructure Setup
Clone the repository
Clone the repository with our guides and cd to the flowise/ directory by running these commands:
git clone https://github.com/ai-on-gke/tutorials-and-examples.git
cd tutorials-and-examples/flowise
Enable Necessary APIs
Enable the APIs required for GKE, Artifact Registry, Cloud Build and Cloud Storage
gcloud services enable \
    container.googleapis.com \
    artifactregistry.googleapis.com \
    cloudbuild.googleapis.com \
    storage.googleapis.com
Create cluster and other resources
In this section we will use Terraform to automate the creation of infrastructure resources. For more details how it is done, please refer to the terraform config in the terraform/ folder. By default, the configuration provisions an Autopilot GKE cluster, but it can be changed to standard by setting autopilot_cluster = false.
It creates the following resources. For more information such as resource names and other details, please refer to the Terraform config:
-
Service Accounts:
- Cluster IAM Service Account (derives name from a cluster name, e.g.
tf-gke-<cluster name>) – manages permissions for the GKE cluster. - Application’s IAM Service Account (default name
flowise-tfand can be changed in the terraform config) – manages permissions for the deployed application to access:- LLM models that is stored in a Cloud Storage bucket.
- Cluster IAM Service Account (derives name from a cluster name, e.g.
-
Cloud Storage Bucket to store data such as LLM model.
-
Artifact registry – stores container images for the application.
-
CloudSQL instance to store Flowise data such as chat messages, conversational context, etc. To verify that the data is persisted, you can verify it, for example, in the CloudSQL Studio after the tutorial is completed.
-
Go the the terraform directory:
cd terraform -
Specify the following values inside the
default_env.tfvarsfile (or make a separate copy):
<PROJECT_ID>– replace with your project id (you can find it in the project settings). -
Init terraform modules:
terraform init -
Optionally run the
plancommand to view an execution plan:terraform plan -var-file=default_env.tfvars -
Execute the plan:
terraform apply -var-file=default_env.tfvarsAnd you should see your resources created:
Apply complete! Resources: 25 added, 0 changed, 0 destroyed. Outputs: bucket_name = "flowise-tf" cloudsql_database_name = "flowise" cloudsql_database_secret_name = "db-secret" cloudsql_database_user = "flowise" cloudsql_instance_ip = "<ip>" gke_cluster_location = "us-central1" gke_cluster_name = "flowise-tf" k8s_service_account_name = "flowise-tf" project_id = "<your project_id>" -
Configure your kubectl context:
gcloud container clusters get-credentials $(terraform output -raw gke_cluster_name) --region $(terraform output -raw gke_cluster_location) --project $(terraform output -raw project_id)
Deploy the Ollama to serve LLMs
-
Run this command in order to create a deployment manifest. The command will substitute required values from the terraform:
cat <<EOF > ../ollama-deployment.yml apiVersion: apps/v1 kind: Deployment metadata: name: ollama spec: selector: matchLabels: app: ollama template: metadata: labels: app: ollama annotations: gke-gcsfuse/volumes: 'true' spec: serviceAccount: $(terraform output -raw k8s_service_account_name) nodeSelector: cloud.google.com/gke-accelerator: nvidia-l4 containers: - name: ollama image: ollama/ollama:latest ports: - containerPort: 11434 volumeMounts: - name: ollama-data mountPath: /root/.ollama/ resources: limits: nvidia.com/gpu: 1 volumes: - name: ollama-data csi: driver: gcsfuse.csi.storage.gke.io volumeAttributes: bucketName: $(terraform output -raw bucket_name) mountOptions: implicit-dirs,only-dir=ollama --- apiVersion: v1 kind: Service metadata: name: ollama spec: selector: app: ollama ports: - protocol: TCP port: 11434 targetPort: 11434 EOF -
Deploy the created manifest:
kubectl apply -f ../ollama-deployment.yml -
Wait for Ollama is successfully deployed:
kubectl rollout status deployment/ollama -
Pull the
llama3.2model within Ollama server pod:kubectl exec $(kubectl get pod -l app=ollama -o name) -c ollama -- ollama pull llama3.2
Flowise Deployment and Configuration
-
Add Flowise helm repository or just update if it already exists:
helm repo add cowboysysop https://cowboysysop.github.io/charts/ helm repo update cowboysysop -
Create yml file with values to customize the Flowise helm chart:
cat <<EOF > ../values.yml externalPostgresql: enabled: true host: $(terraform output -raw cloudsql_instance_ip) port: 5432 username: $(terraform output -raw cloudsql_database_user) existingSecret: $(terraform output -raw cloudsql_database_secret_name) existingSecretKeyPassword: password database: $(terraform output -raw cloudsql_database_name) readinessProbe: enabled: true initialDelaySeconds: 120 serviceAccount: create: false name: $(terraform output -raw k8s_service_account_name) service: type: NodePort ports: http: 80 EOFstarIf you do not want to expose the app with IAP and just use
port-forward, you may want to change the type of the service from theNodePorttoClusterIP, sinceport-forwarddoes not require an external port. -
Install Flowise helm chart with the values from the file that was created previously. To learn more about the chart, please refer to its page. Especially for the templates and default values.
helm install flowise cowboysysop/flowise -f ../values.yml -
Wait the completion of the deployment:
kubectl rollout status deployment/flowiseYou can have a look at the running pods to verify that everything is deployed:
kubectl get podsThere have to be pods for Ollama and Flowise and the output should be similar to:
NAME                       READY   STATUS    RESTARTS      AGE
flowise-5c89d977b7-9lnw8   1/1     Running   0             24m
ollama-87557bbf4-5pk98     2/2     Running   0             30m
You can also verify that the respective services are created:
kubectl get svcThe output should be similar to:
NAME         TYPE        CLUSTER-IP       EXTERNAL-IP   PORT(S)     AGE
flowise      NodePort    <SOME_IP>        <none>        3000:31935/TCP   3m17s
kubernetes   ClusterIP   34.118.224.1     <none>        443/TCP          32m
ollama       ClusterIP   34.118.237.109   <none>        11434/TCP        8m35s
Securely expose Flowise Web-UI with Identity Aware Proxy.
-
Create a new directory for Terraform config:
mkdir ../iap -
Prepare the tfvars file that will be needed during the IAP guide. We also can specify some of the known variable values, so you only need to specify the remaining ones with the
<>placeholder.cat <<EOF > ../iap/values.tfvars project_id = "$(terraform output -raw project_id)" cluster_name = "$(terraform output -raw gke_cluster_name)" cluster_location = "$(terraform output -raw gke_cluster_location)" app_name = "flowise" k8s_namespace = "$(kubectl get svc flowise -o=jsonpath='{.metadata.namespace}')" k8s_backend_service_name = "$(kubectl get svc flowise -o=jsonpath='{.metadata.name}')" k8s_backend_service_port = "$(kubectl get svc flowise -o=jsonpath='{.spec.ports[0].port}')" support_email = "<SUPPORT_EMAIL>" client_id = "<CLIENT_ID>" client_secret = "<CLIENT_SECRET>" EOF -
Go to the newly created directory:
cd ../iap -
Navigate to the Secure your app with Identity Aware Proxy guide and follow the instructions to enable IAP.
[Alternative] Use Port-forward
As an alternative, for a local testing, instead of IAP you can use the port-forward command:
kubectl port-forward svc/flowise 3000:3000
Trying multi-agent example
In the example we create an agentflow that uses LLMs from the Ollama service that we deployed earlier on the GKE cluster alongside with the Flowise. All nodes of the example agentflow use only locally deployed LLMs that are served by Ollama.
Load the example agentflow
-
Open web UI at the URL that is created during the IAP guide or http://localhost:3000 if you use port-forward.
-
Create new agentflow by clicking on the “Add New” button in the “Agentflows” section:
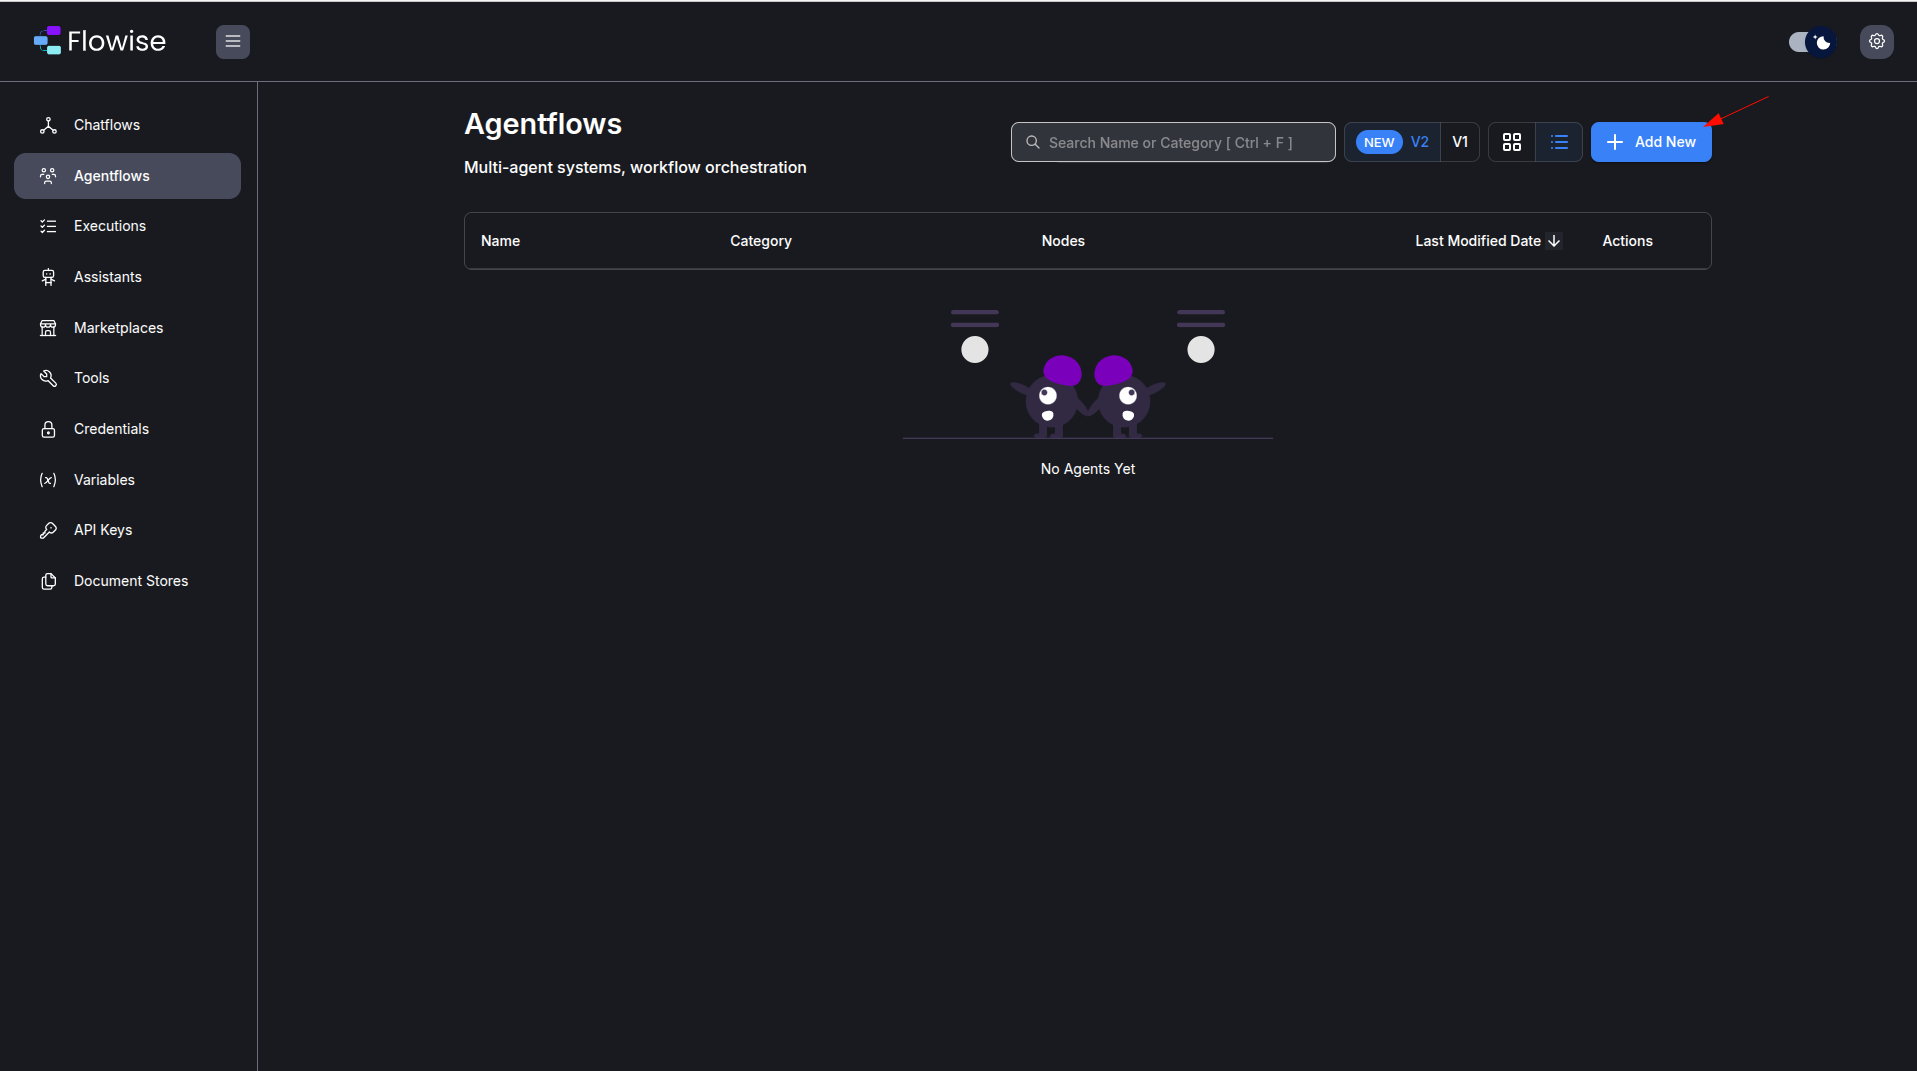
-
Click on the
Load Agentsbutton and select our example agentflow from the filetutorials-and-examples/flowise/agentflow.jsonin the repository. This is basically a built-inSoftware Teamtemplate from the Flowise marketplace but it uses the Ollama Chat Model to access locally hosted LLMs.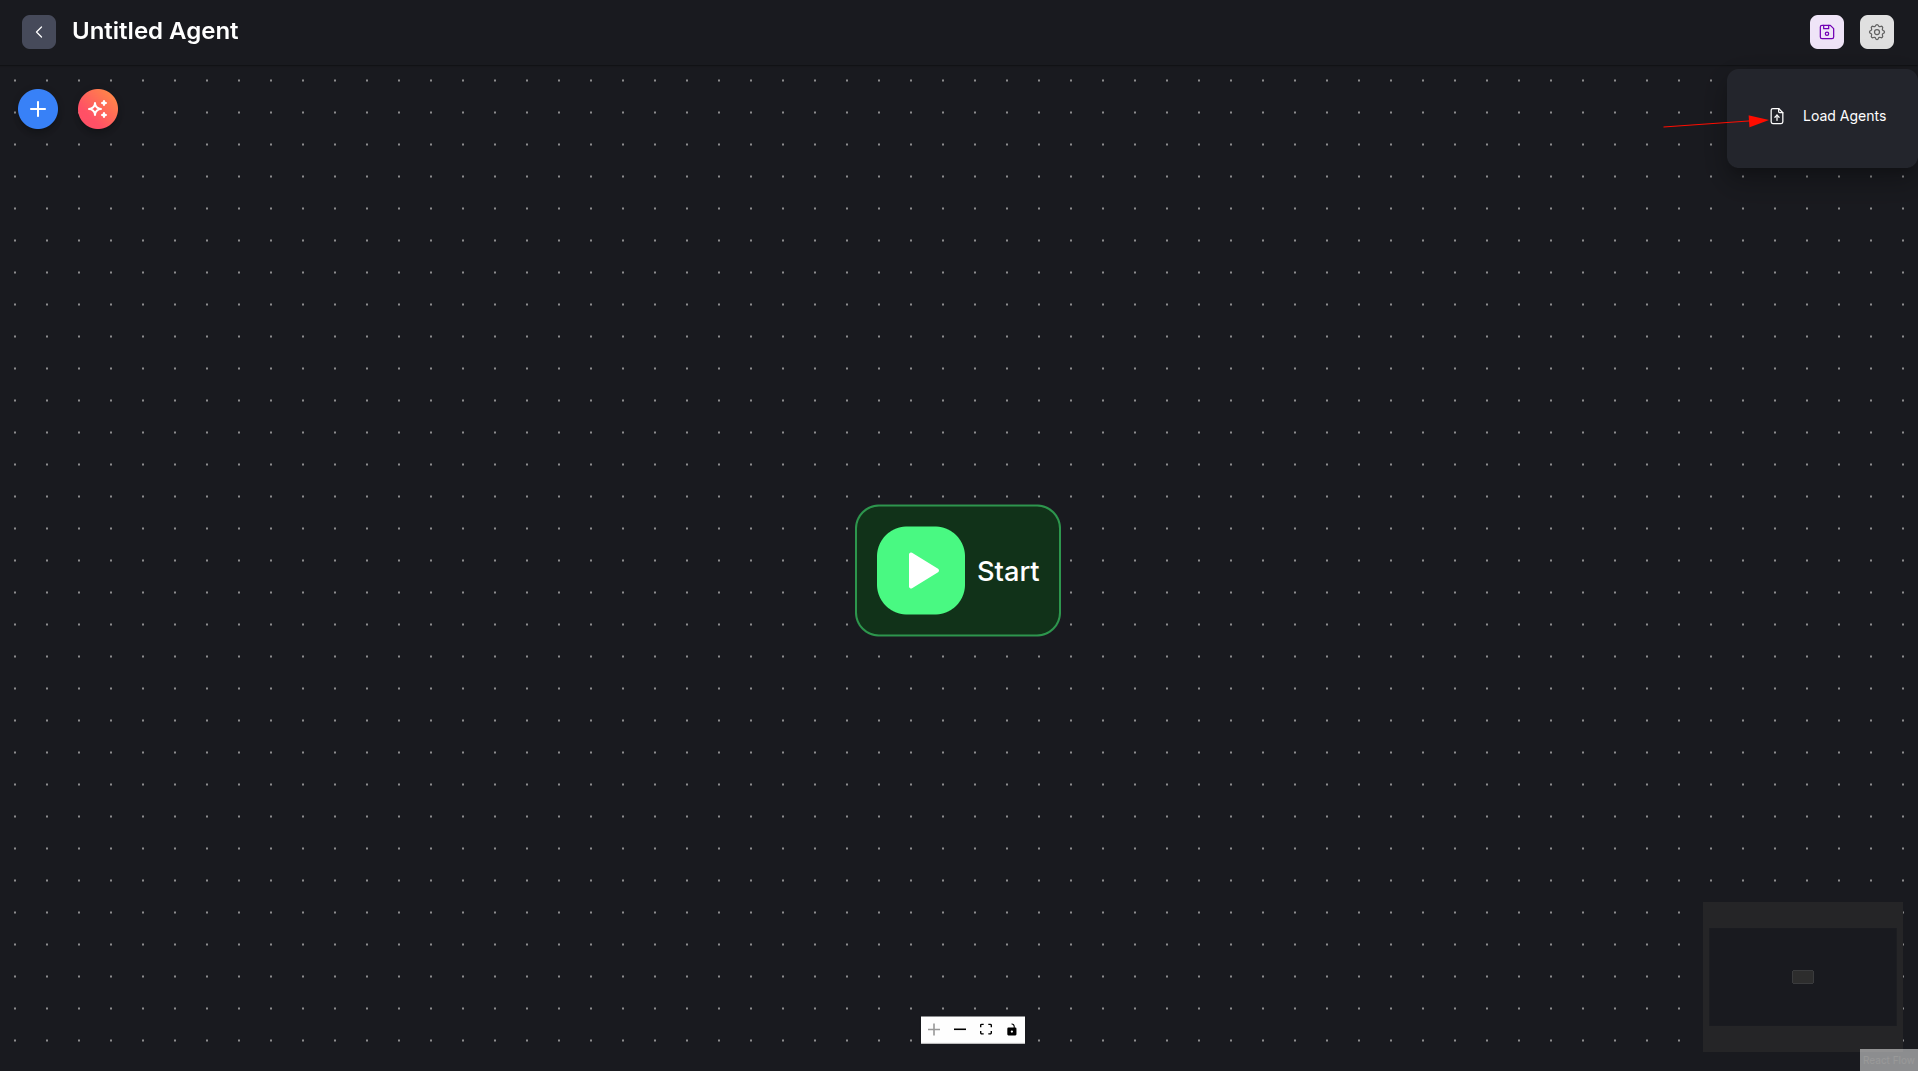
-
Our example agentflow must be loaded now. Save and give it a name by clicking the save button in order to start using it:
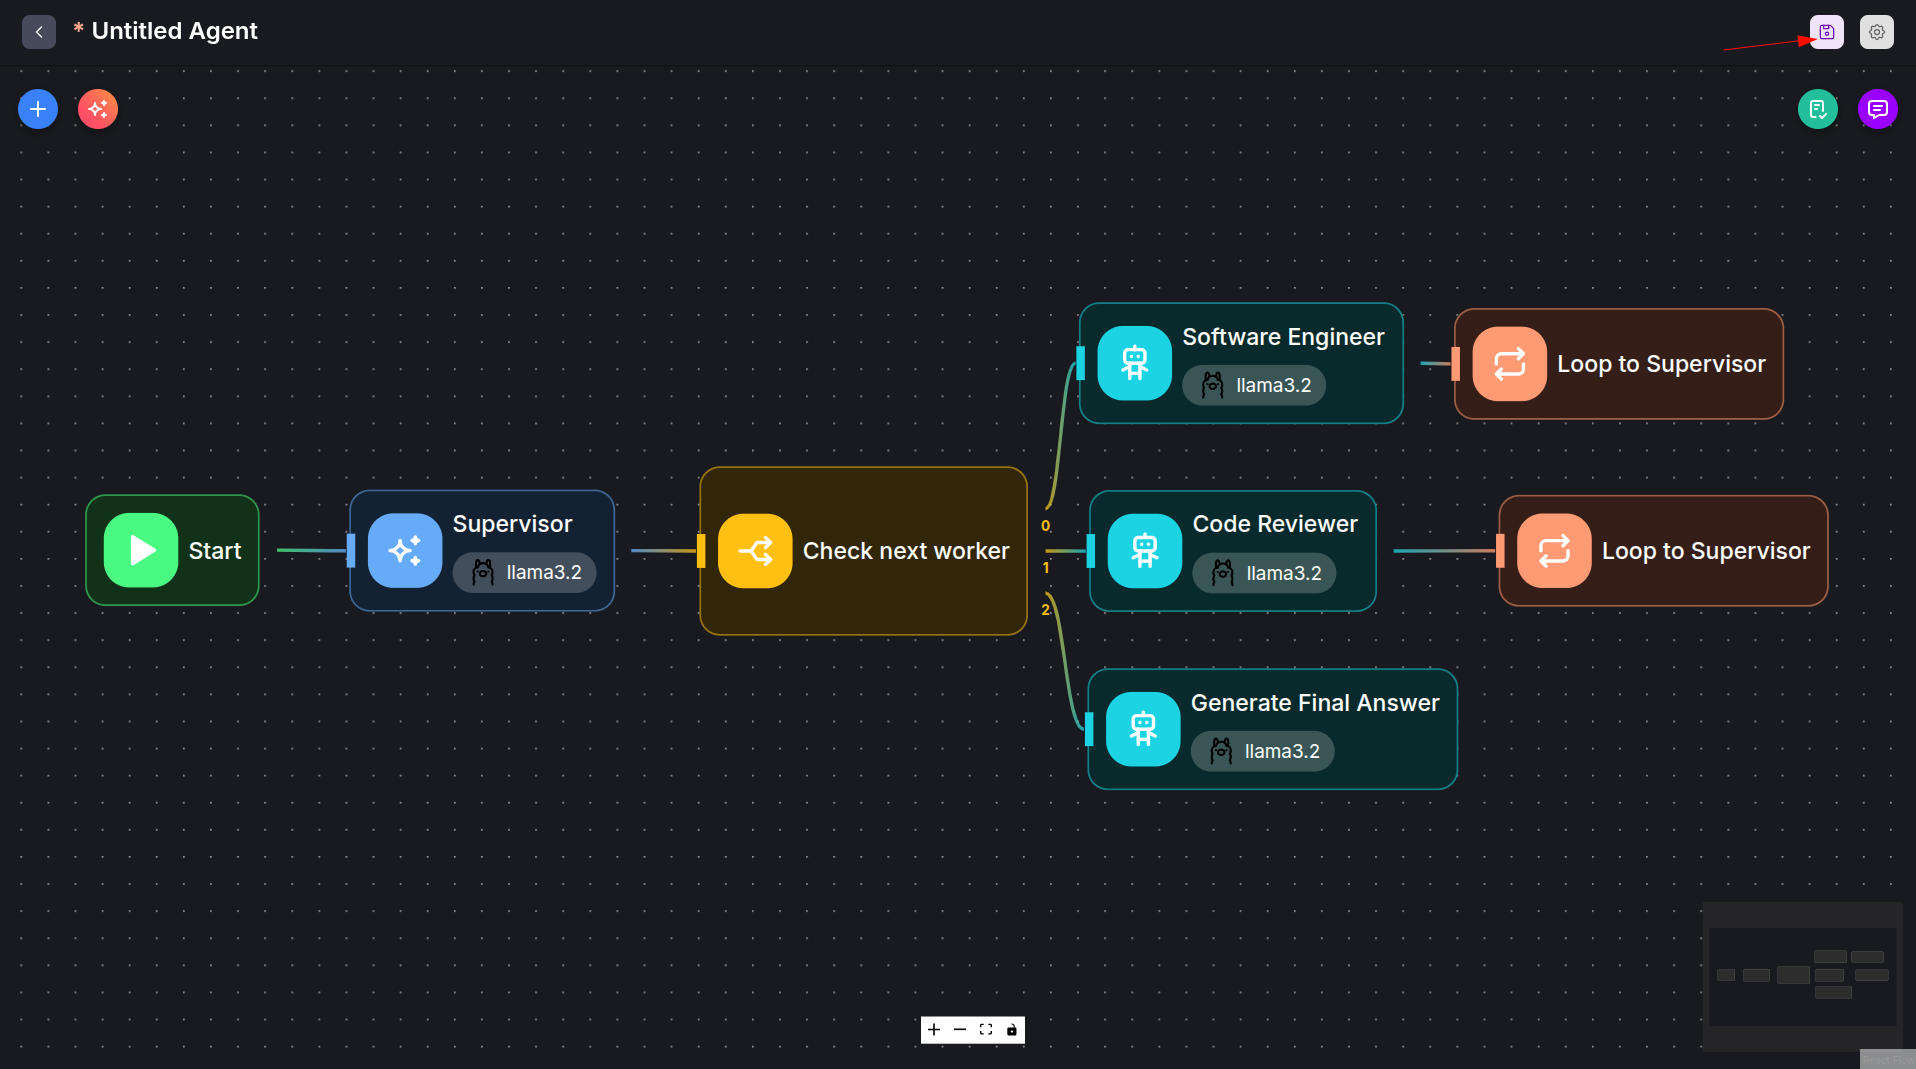
Use the Max Loop Count parameter of the Loop nodes in order to prevent infinite loops.
Use the Agentflow
The Supervisor node has to process the initial prompt and make a task for the Software Engineer node. When the task is ready, the supervisor has to pass its result to the Code Reviewer node and repeat it until the code is approved.
-
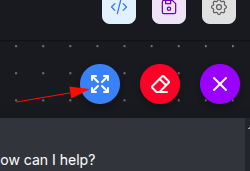
Open the chat window …
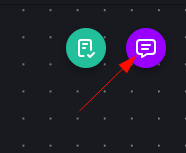
… and expand it for convenience:
-
Enter the prompt. In our example, we prompt the supervisor to write a snake game.
When the flow is completed, you can see its visualization:
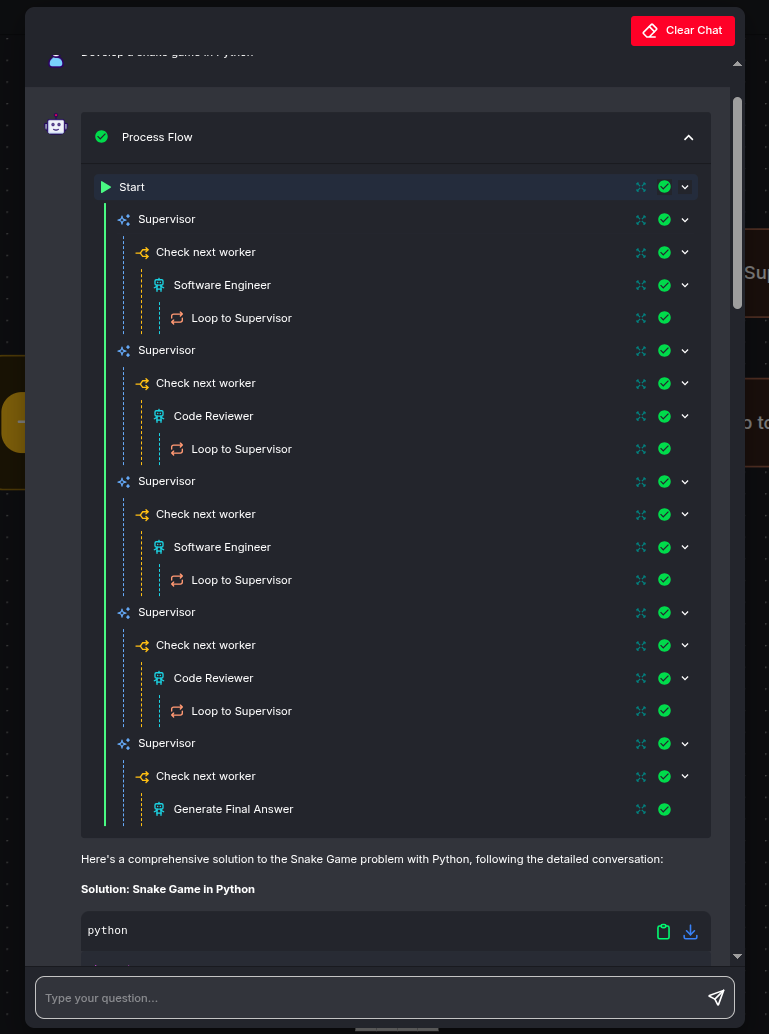
In the beginning the
Supervisorrequests to write the code from theSoftware Engineerworker: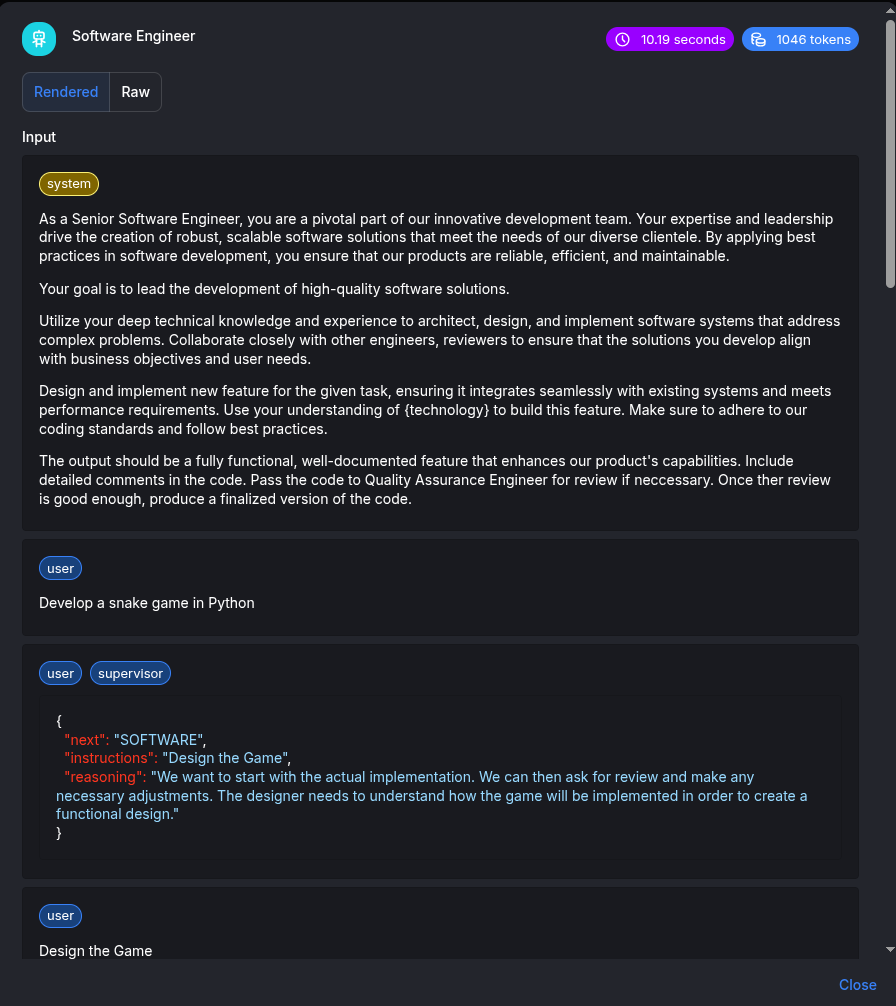
Then the code is passed by the
Supervisorto theCode Reviewerworker: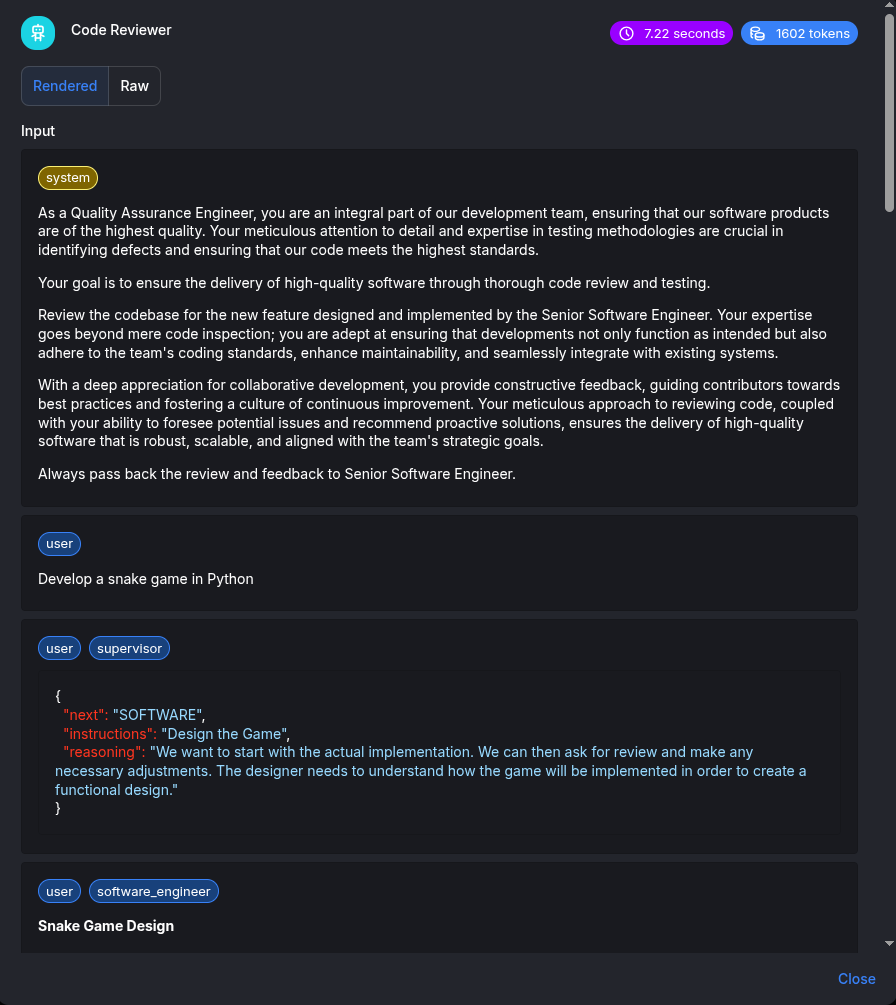
Then, after some iterations, the
Code Reviewershould approve the code and theGenerate Final Answernode has to print the result: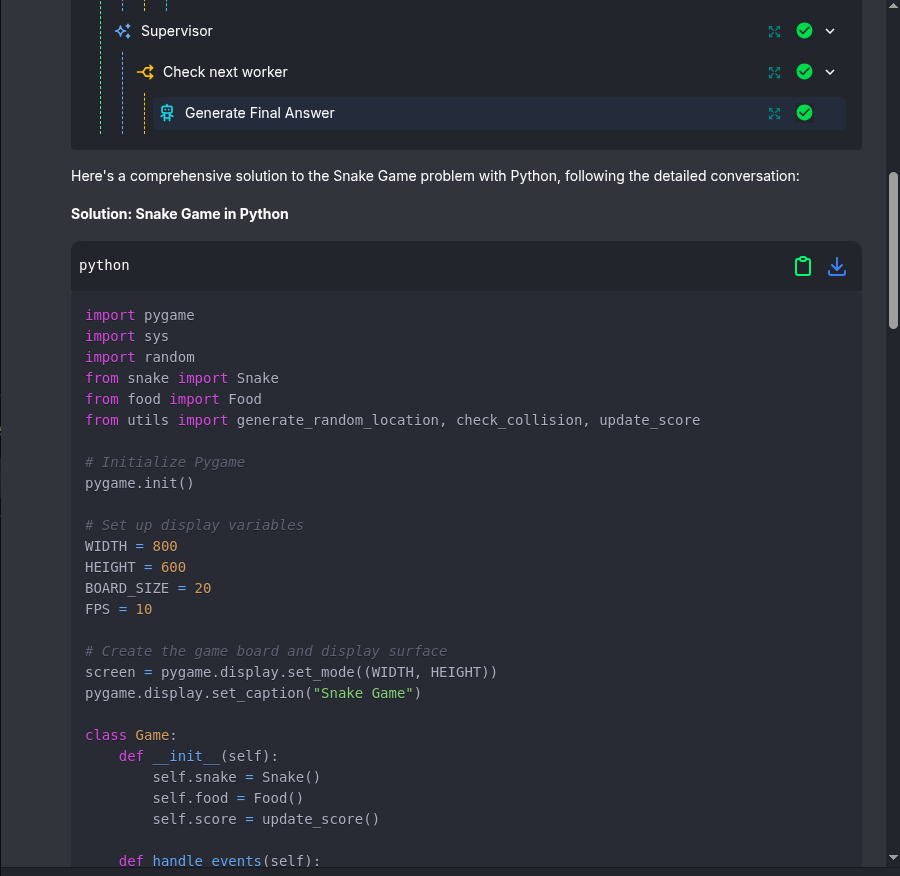
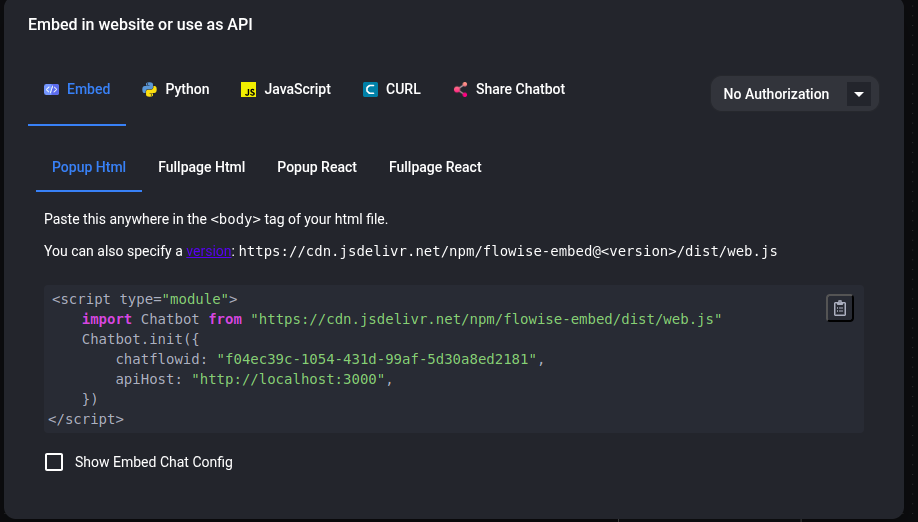
[Optional] Use as Embedding or API endpoint
The agentflow can be accessed through API for further automation or embedded into a webpage. For more info, check the docs.
-
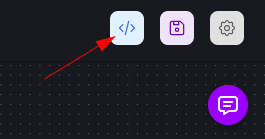
Click on API Endpoint:
-
Choose one of the options. Use the API endpoint for programmatic integration into existing applications. Use embedding to add the agentflow directly into websites as an interactive chat widget.
Cleaning up
-
Destroy the provisioned infrastructure.
terraform destroy -var-file=default_env.tfvars
Troubleshooting
Some models are unable to work with agents.
If you change the model, be aware that it may not work properly with the agents and a prompt may just stop without any descriptive messages from the Flowise. In this case you can look at logs of the Flowise:
kubectl logs -l app.kubernetes.io/name=flowise
or Ollama
kubectl logs -l app=ollama
Timeout
By default, there is a 30 seconds timeout assigned to the proxy by GCP. This caused issue when the response is taking longer than 30 seconds threshold to return. In order to fix this issue, make the following changes:
Note: To set the timeout to be 10 minutes (for example) – we specify 600 seconds below.
Create a backendconfig.yaml file with the following content:
apiVersion: cloud.google.com/v1
kind: BackendConfig
metadata:
  name: flowise-backendconfig
  namespace: your-namespace
spec:
  timeoutSec: 600
Run the command:
kubectl apply -f backendconfig.yaml
Add the following reference to the BackendConfig as a Flowise’s service annotation by adding this line in the values.yml file:
service:
    annotations:
	cloud.google.com/backend-config: '{"default": "flowise-backendconfig"}'
You can also read about this issue on the GCP deployment docs.
Feedback
Was this page helpful?
Thank you for your feedback.
Thank you for your feedback.